


DIY interior stucco is a layered wall coating applied by hand using a trowel and plaster mix to create texture, depth, and a handcrafted look on plain walls. Unlike exterior stucco, which relies on heavy cement-based coats over lath, the interior version uses lighter, thinner coats — typically 1/8 to 1/4 inch — over prepped drywall or existing plaster. With the right bonding agent, a quality mix, and basic tool technique, most beginners can finish an accent wall over a weekend.
This guide covers everything the basic tutorials skip: which tools actually matter and why, how to prep painted drywall properly, realistic drying and curing timelines, common beginner mistakes, and whether real stucco or a faux finish makes more sense for your skill level and space. If you’ve been watching exterior stucco videos and feeling overwhelmed, you’re in the right place.
What Interior Stucco Actually Is (And What It Isn’t)
If you picture the rough, pebbly exterior of a Spanish-style home, that’s not what you’re doing on your living room wall.
Interior stucco texture refers to a wall coating — often a premixed plaster or lime-based product — applied in thin layers to create visual depth and a handmade surface. Design circles sometimes call it Venetian plaster or a textured lime finish. The result looks like something that took decades to build, not a weekend to apply.
The key difference between exterior and interior stucco walls DIY comes down to weight and thickness. Full cement stucco systems are built for outdoor durability and use three heavy coats over wire lath. On standard drywall indoors, that approach adds unnecessary weight, raises cracking risk in dry air, and is nearly impossible to repair cleanly. Interior versions use much lighter, breathable mixes — and that’s by design.
Real Stucco vs. Faux Stucco: Which One Should You Choose?
This question comes up every time someone Googles how to texture interior walls, and the honest answer is: it depends on how permanent you want the result.
Real stucco — even the interior-grade version — bonds chemically to your wall. Once cured, it’s practically rock-hard and can last 10 to 20 years with almost no maintenance. It adds subtle soundproofing, resists dings far better than painted drywall, and if you use a lime-based mix, it actually helps regulate indoor humidity by absorbing and releasing moisture as conditions change.
Faux stucco, usually done with joint compound and paint, is lighter, cheaper, and reversible. It looks convincing from a few feet away, dries faster, and sands down easily if you change your mind. For a first project — or a rental where you can’t make permanent changes — faux is a genuinely smart call.
For the rest of this guide, the focus stays on real interior stucco. Faux techniques follow similar prep steps but with far less physical effort.
Tools and Materials You Need Before You Start
Trying to find a hawk mid-project with wet plaster on your trowel is exactly as stressful as it sounds. Get everything together first.
What you need:
- Interior stucco mix or premixed finish plaster (avoid heavy cement-based products on standard drywall)
- Bonding agent — PVA primer or a concrete bonder works; this step is non-negotiable
- Steel trowels — at least one flexible 10 to 12-inch finish trowel, plus a margin trowel for edges and tight spots
- Hawk — the flat plate with a handle that holds your plaster while you work
- Mixing drill with a paddle attachment
- Drop cloths and plastic sheeting (and more than you think you need)
- Painter’s tape for edges, outlets, and trim
- Sponge or brush for texture effects
- Fine-grit sandpaper for touch-ups
- Dust mask, gloves, and eye protection
- Optional: acrylic additive for better workability in warm or dry rooms
A word on trowel quality: a cheap, stiff trowel makes the finish coat significantly harder to control. A flexible steel blade lets you apply even pressure across the surface, which matters most during burnishing. It’s one tool worth spending a bit more on.
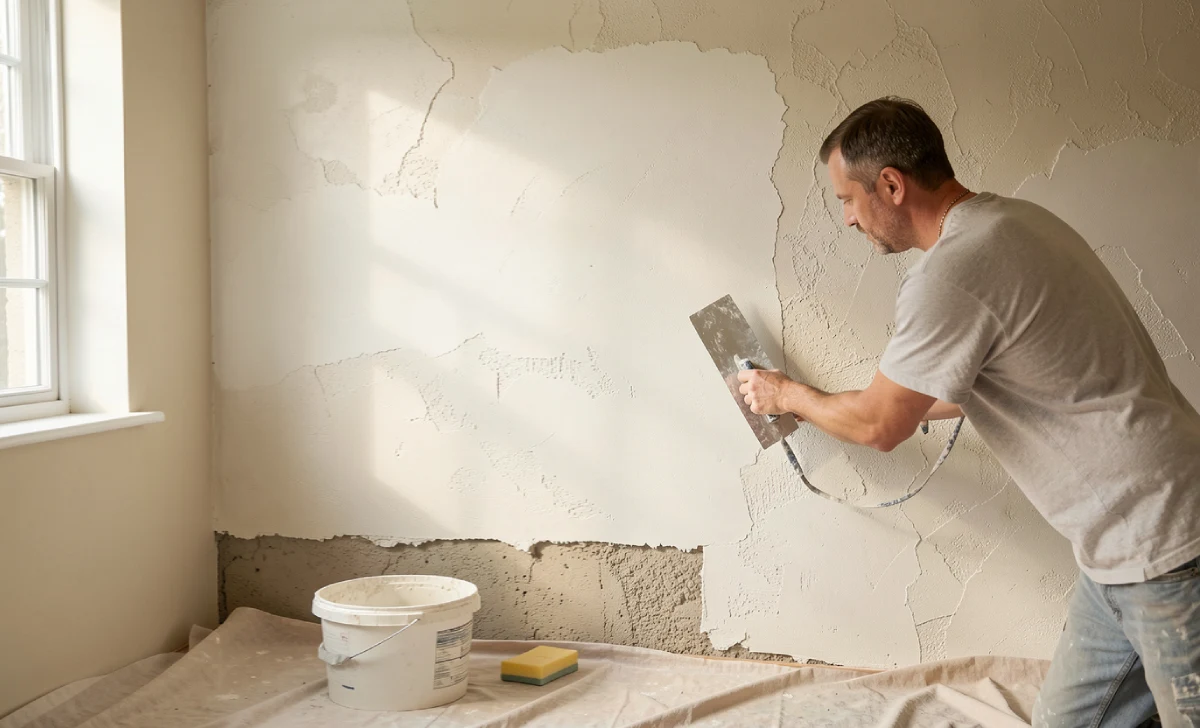
Step-by-Step: How to Apply Stucco to Interior Walls
Step 1: Prep the Room and the Wall
Good prep determines whether the stucco stays on the wall for 15 years or peels in 15 months.
Clear the room as much as you can. Lay drop cloths from the base of the wall out at least three feet — wet plaster flicks further than you expect. Remove outlet covers and tape plastic over electrical boxes.
Clean the wall with a damp cloth or a diluted TSP solution to remove dust, grease, and residue. Let it dry fully. Fill any cracks or holes with patching compound and sand them flush.
If the wall has glossy paint, sand it lightly to rough up the surface. Stucco needs a mechanical grip to bond. Then apply your bonding agent — roll or brush it on evenly and let it get tacky before moving to the next step. Skipping this on a painted wall is the most common reason first-time stucco jobs peel.
Step 2: Mix Your Stucco
Follow the bag instructions for water ratios — too wet, and it’ll slump and crack; too dry,y and it won’t spread. You’re aiming for a consistency close to thick peanut butter: stiff enough to hold its shape on the trowel, wet enough to spread smoothly.
Let the mix rest for a minute or two after the first blend, then remix. This “slaking” step improves consistency. In warm or dry rooms, add a splash of acrylic additive to slow the set time and improve flexibility.
Mix only what you can use in 30 to 45 minutes. Stucco sets faster indoors than most beginners expect, especially near heating vents.
Step 3: Apply the Base Coat
Load your hawk, scoop a portion onto the trowel, and push it onto the wall using firm upward strokes. Work from the bottom up to catch drips naturally. You’re not aiming for beauty here — just even coverage at about 1/8 inch thick.
Once the base coat is up, drag a trowel edge or a scratch tool lightly across the surface in horizontal lines. These scratches give the finish coat something mechanical to grip. Let this coat dry for at least 24 hours before moving on.
Step 4: Apply the Finish Coat
This is wherethat stucco-texturede interior really comes together.
Lightly mist the base coat with a spray bottle — just enough to slow moisture absorption. This stops the dry wall from pulling the water out of your finish coat too fast, which causes uneven set times and surface cracking.
Apply a thin, even layer of finish material with your trowel held at a shallow angle. Use firm, consistent pressure. Fill in the scratch lines from the base coat as you go. Work 3×3-foot sections and keep a wet edge as you move across the wall.
After 10 to 15 minutes — when the surface starts to firm but hasn’t fully set — go back over it with a clean, dry trowel. This burnishing step compresses the surface, closes micro-cracks, and creates the subtle sheen that separates real interior stucco from a basic texture job. The longer and harder you burnish, the shinier the result.
Step 5: Choose Your Texture
The finish coat gives you full control over the final look.
- Smooth and polished: keep troweling and burnishing until the surface flattens out
- Swirl or stipple: press a damp sponge into the wet surface and twist
- Skip-trowel: drag the trowel edge lightly across the surface for random high and low spots
- Cloud effect: apply finish in overlapping patches at varying thickness
Practice any pattern on a scrap piece of drywall first. The first wall teaches you more than any video tutorial will.
Common Mistakes Beginners Make
- Mixing too much at once — you will waste half the bucket
- Working too large a section — sections bigger than 3×3 feet dry before you finish troweling, leaving hard seams
- Dirty trowel — one speck of dried mix on the blade scratches your fresh finish; wipe it constantly with a wet rag
- Applying too thick indoors — anything over 1/4 inch on standard drywall adds weight and cracking risk without adding visual benefit
- Rushing the cure — the surface looks dry in a few hours but stays soft for days; don’t lean anything against it for at least a week
Drying and Curing: The Part Nobody Talks About
The surface of your stucco will feel dry to the touch in two to four hours. Full hardening takes much longer — anywhere from one week to several weeks, depending on your room’s humidity, temperature, and the type of mix used. Lime-based products cure particularly slowly.
Keep the room well-ventilated but avoid blasting it with heat or fans. Rapid drying pulls moisture out too fast and causes surface cracks. If your home runs dry in winter, a humidifier nearby during the first few days helps significantly.
Don’t paint or seal until the stucco has cured for at least 48 hours — preferably longer.
Maintaining a Stucco Wall Long-Term
Textured walls collect dust differently from flat ones. A standard cloth or Swiffer won’t do it. Use a soft brush vacuum attachment or a blind-style duster to work into the surface. For deeper cleaning, a barely damp sponge works well, but test a small hidden area first — some sealed finishes need specific care.
Over time, heavily touched areas like corners and doorframes may show wear. Patch them with the same mix, feather the edges, and blend the texture as best you can while the patch is still wet.
FAQs
Can you really put real stucco on interior walls, or is it only for exteriors?
Yes, real stucco works on interior walls when you use an interior-grade or lime-based mix. Full cement exterior stucco is too heavy and hard to repair inside. Stick with finish plasters or premixed products labeled for interior use.
Will stucco work over painted drywall, or do I need special prep?
Stucco works over painted drywall, but you must sand glossy surfaces and apply a bonding agent first. Without those two steps, adhesion fails and the stucco peels — sometimes within months.
Is DIY interior stucco the same process as exterior stucco?
No. Exterior systems use multiple thick coats over wire lath and cement-based mixes. Interior stucco uses thinner coats, lighter materials, and typically no lath. The trowel technique is similar, but the scale and product selection differ significantly.
What’s easier for beginners — real stucco or a faux finish?
Faux is easier and cleaner for a first project. Real stucco has more authentic depth and lasts far longer, but the learning curve is steeper, and the mess is real. Start with one small accent wall before committing to a full room.